It’s really easy to start uploading on Pikvector
You just need to follow the below steps for uploading in Pikvector:
1. First go to your seller dashboard, then click on “add file” option.
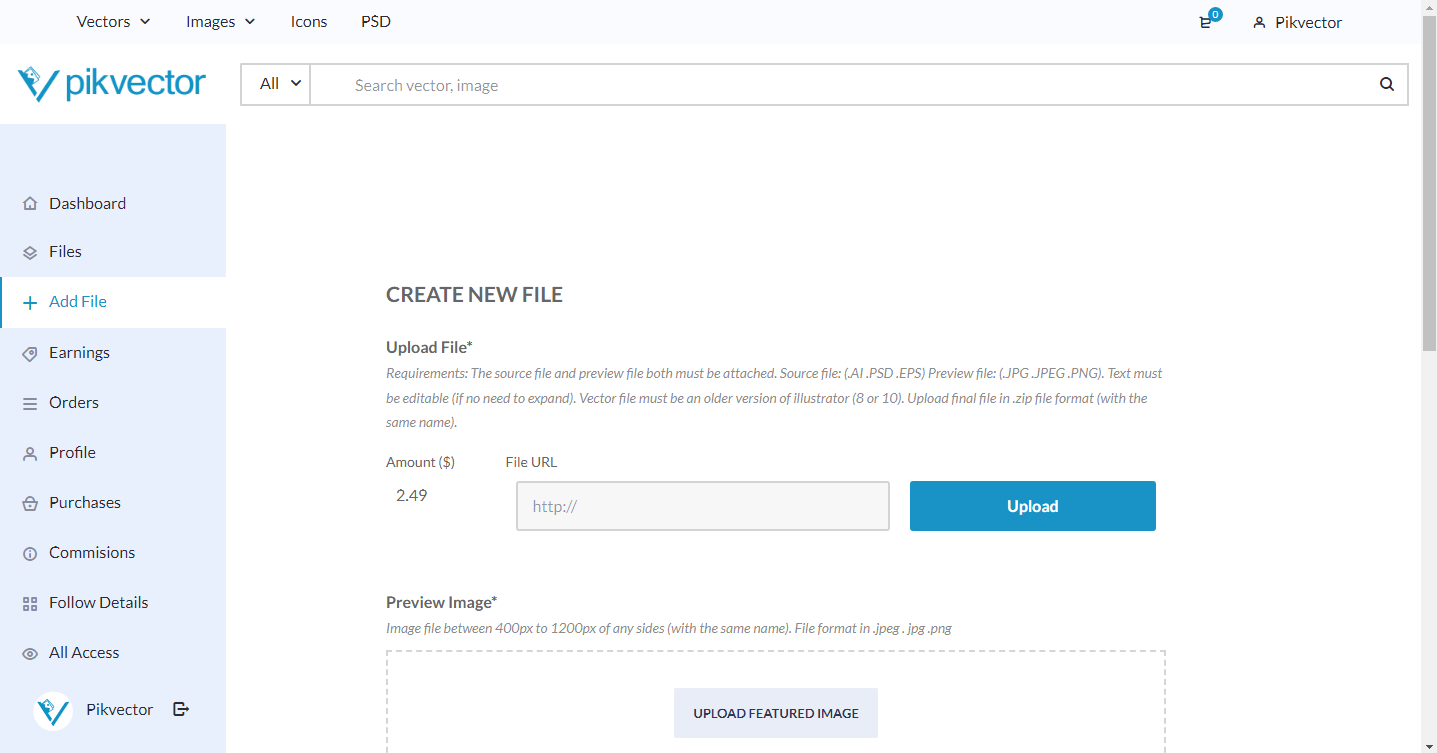
2. Click on “upload” button for uploading your design’s file. The file must contain source file like eps, ai or PSD and preview file jpg or png (file must be in zip format).
Note: just ignore the File URL option.

3. Click upload files on the top of left side then click on “select files” button and upload zip file from your pc.

4. Select your uploaded file and click on “insert file URL” button.
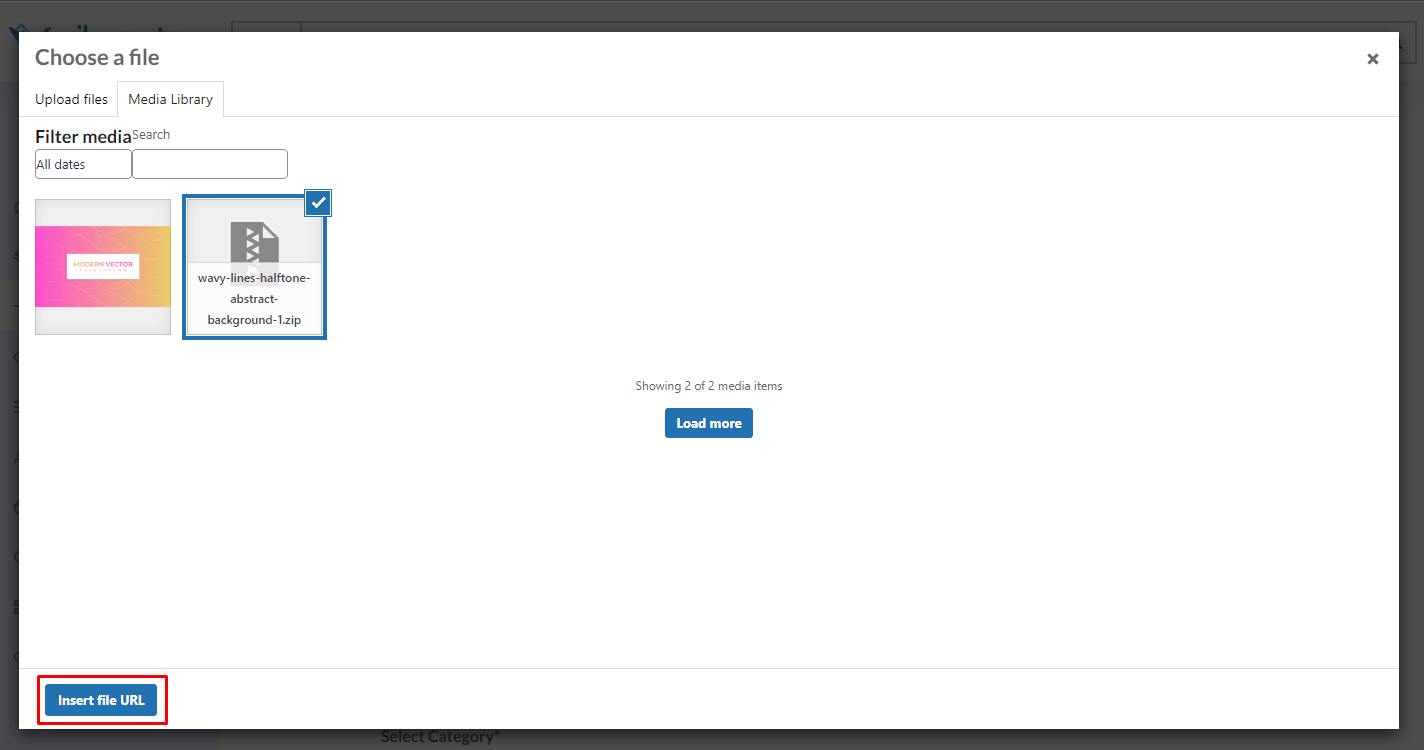
You successfully uploaded your zip file.
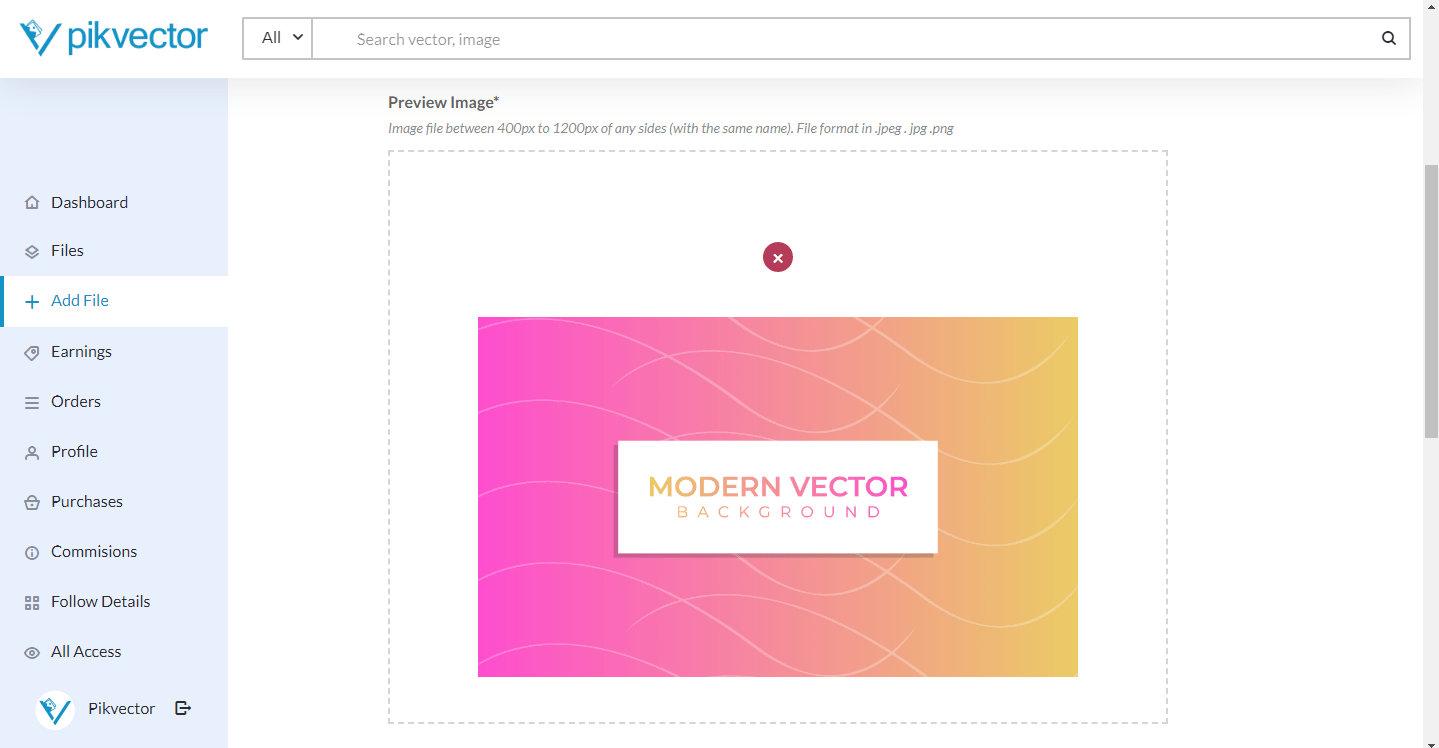
5. Now upload feature image for preview, format must be in jpeg, jpg or png.
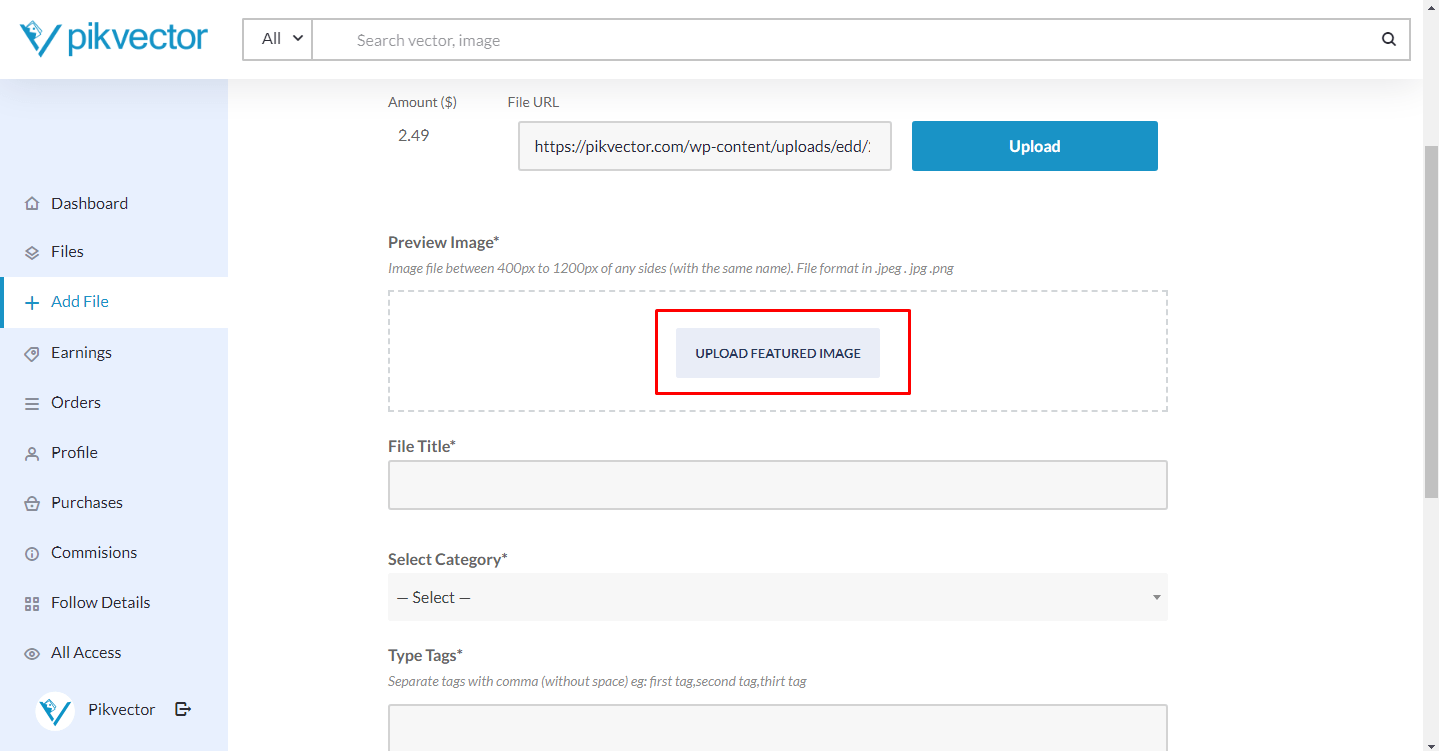
As you can can see on below image:
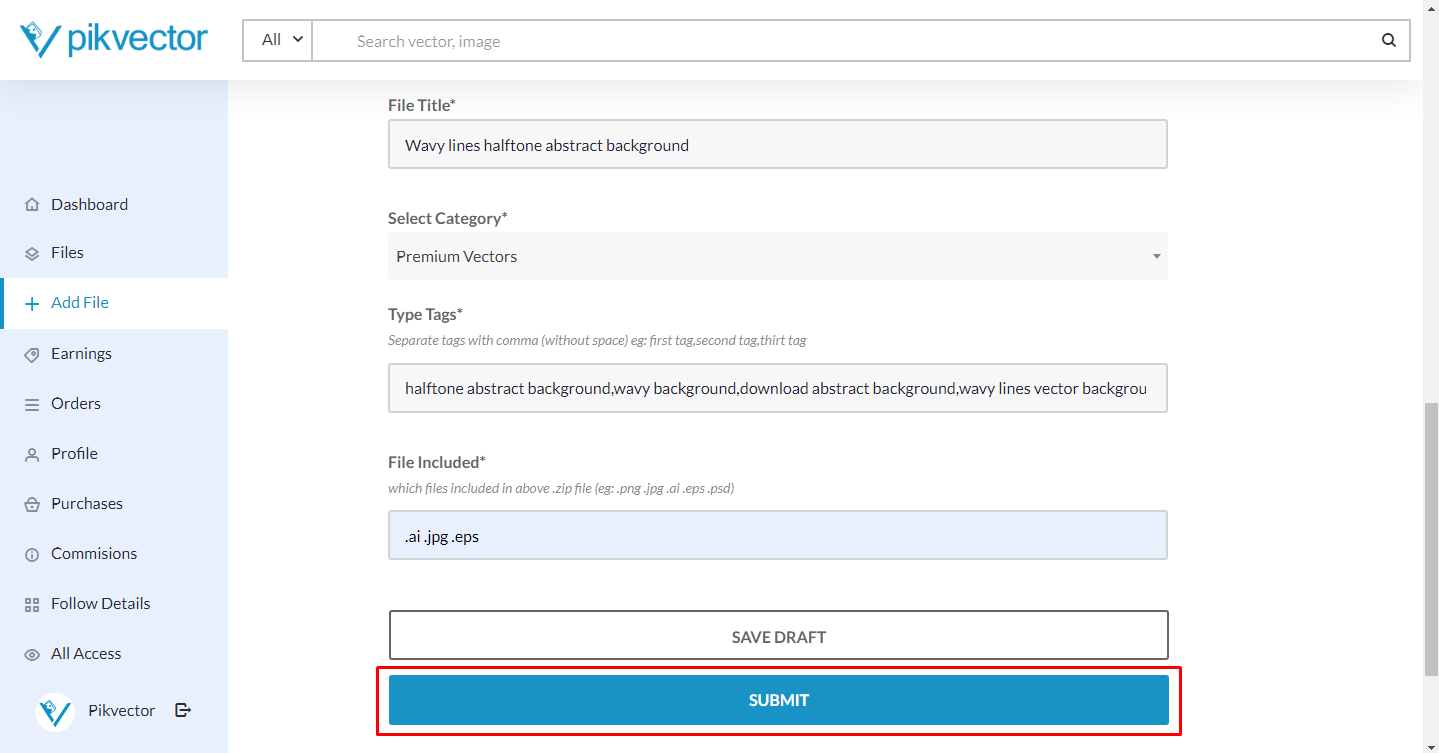
6. And then add Title, select Category, type Tags, and file formats name which is included in a zip file.
Note:
Tags: You need to separate tags with a comma (,) without space just like:
vector art,download abstract backgound,modern colorful vector background.
File Included: Type file format names that are available on a zip file that you uploaded before as you can see in the below image. If you’re uploading a photo then also mention its dimension (eg: 4500 x 5000px .jpeg).
Then click on “submit button“.
And Done! Your file has been submitted successfully. Kindly upload at least 9 more files to approve your seller account.

Also kindly follow these Guidelines before uploading.
If you need help or facing any issue you can contact us [email protected]
Related Blog Post


Popular Blog Post
Featured Products